Showing posts with label shape card. Show all posts

Wednesday, August 21, 2013

Santa Bear

Hi Everyone!  I have a super cute shape card to share for Christmas today.


I used Ribbons and Rosettes for the tree.  I sized it at 5" in CCR.  I flipped one and welded the two images together in white to create the shape card and cut another tree in green for the card front.  I cut the Santa Bear from Teddy Bear Parade at 3" and found the santa bag on Paper Doll Dress Up and cut that at 1.75"  I decorated the tree with various gems and rhinestone embellishments from my stash.  The santa bear is popped up on foam tape for some dimension.

The sentiment inside comes from a stamp set by MaymayMadeIt called Beary Sentimental.  Her stamps can be found in her Etsy shop.  Super cute!

Have a great day!!!

Linking to:
Festive Friday: holiday project with a children's theme
Jo's Scrap Shack - anything goes
CardzTv - pop it up

August Special Sweetening the Deal - spend $50 and get the August stamp of the month for FREE!!
Click here to see my 3x3 cards using this set!

Saturday, August 3, 2013

Party Like a Rockstar!

Happy Saturday!!  Today I have a card to share with you that I made for my husband's birthday.  I started looking for cuts that had guitars - he is a phenomenal guitar player!  I came across this one on the Birthday Bash cartridge and thought it was perfect!


The card base and star layer were cut at 5".  Both papers came from the DCWV premium stack called dots, stripes & plaids.  All the other papers used for the card came from my scrap bin.  The fox and all his layers were cut at 4".  The Rock Star stamp is from Studio G.


Inside I simply stamped Happy Birthday so I had enough room for my message.  This stamp is from Unity Stamp Co.


Happy Birthday Husband!!!!


Wednesday, July 31, 2013

Hot Diggity Dog!

Hot dog, hot dog, hot diggity dog....Do you ever get that song from Mickey's Playhouse stuck in your head?  My son is heading into first grade in a couple weeks and doesn't watch the show very often anymore but there must have been a good episode on the other day because this song has been stuck in my head since the weekend.  Which also brought me inspiration for today's card.


I found the  hotdog on the Block Party cartridge.  I sized the card base and all the layers at 2.75" and used CCR to weld two together to make the card base. 


This was a quick and easy card to put together and I used all scraps except for the white card base.


The tag was cut from Baby Shower at .75".  The sentiment is from Pink by Design, Simply Everything stamp set.  And the little bee is a dimensional sticker from EK Success Sticko called Sweet Treats that I picked up at Walmart for a dollar or so.


Have a wonderful day!!

Linking to:
Crazy4Challenges - picnic theme
Fantabulous Cricut - shape card
Die Cuttin Divas - anything goes

Tuesday, July 30, 2013

Tommy Circle card

Hi Friends, welcome back!

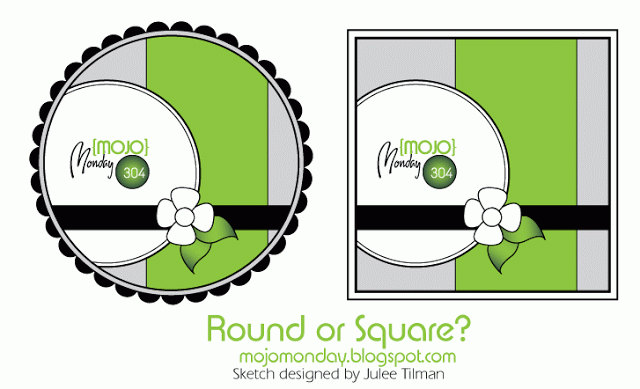
This afternoon I have a sketch card to share with you using the sketch from this weeks Mojo Monday challenge.  Here is the sketch:


And here is my card:


I used Birthday Bash for the card base.  It's the card feature from button 18 sized at 5".  I used Honey cardstock for the base.  The pattern papers are from the Tommy paper pack - this will still be available in the new catalog that's effective Aug. 1st.   The smaller circles on top are cut from outdoor denim and white daisy.  The anchor is cut from Life is a Beach at 1 1/2" and I tied a small bow with red baker's twine.  The stamp set is Sail Away and I used outdoor denim and ruby inks.


I matted the inside with outdoor denim and white daisy and left blank.


Hope you're having a great day and a wonderful week!!

Linking to Mojo Monday

Christmas Door - shape card

Hi Everyone!  Another Christmas card today!  This one is inspired by a color challenge over at Festive Friday.


 I'm more of a traditionalist when it comes to Christmas colors and decorating  so this was definitely a challenge for me, but fun to step out of the box!

Here's what I came up with:


The door come from the Christmas solutions cartridge.  I sized it at 5" and welded two together to make a shape card.  The card and all it's layers are cut with white daisy cardstock.  I used cotton candy ink to highlight some spots on the door.  The wreath comes from Martha Stewart Seasonal Cake Art cartridge.  It is sized at 2 1/2".  The base of the wreath is cut from slate cardstock and the pink for the birds and bow came from my scrap stash. I put a little scrap of yellow behind the window and added a pink rhinestone to the center of the bow.

Inside, I simply stamped it Happy Holidays in cotton candy ink. The sentiment is from an Echo Park stamp set called Season's Greetings by Bella Road.


I like it!  I think I need to find more color challenges so I can step outside my comfort zone a little more :)

Have a great day!!

Linking to Festive Friday

Tuesday, July 9, 2013

Hello Friend

I'm back!  Sorry for being gone for so long...things have been crazy busy at work and last Sunday I cut my finger pretty good and ended up in the ER for the afternoon.  Things are still crazy busy, but I've squeezed in some crafting time!

Today I have a card to share:


I used kraft cardstock and the Birthday Bash cartridge for the card base.  The circle layers are both sides of double sided paper, I inked the edges with Tim Holtz Brushed Corduroy Distress Ink.   The paper is My Mind's Eye, Miss Caroline, Fiddlesticks "Lucky" Tapestry paper. 


The flowers and brad were from my stash.  I'm not sure of the maker as they are all in a  bucket that I pick out of.  The stamp is a Papertrey Ink stamp.  I stamped it with Versamark and used white embossing powder, then lightly inked over that with a gold ink.


The bird and branch are cut from the Home Decor cartridge - another one I don't use very often but love!  I inked around the bird with the corduroy distress ink and added some accents with a white gel pen.  The bird is popped up with foam tape.


I left the inside blank for now.  I already have an idea who is getting this card and I may need all the writing space  :-)


I hope you enjoyed today's card, I'll be back tomorrow with an altered project that goes along with this card.

Also, wanted to bring you up to speed on some Close to My Heart specials going on!  
  - The Let's Get Patriotic campaign is still going on through the end of this month!  Click here for details.
-The July stamp of the month, Sweet Life is only $5.00 with a $50 purchase or $17.95 if purchased alone.  Click here for more details.


and I saved the best for last!
- Work the Workshop promotion!  50% off while supplies last, NO qualifying purchase necessary for the discount!!  Click here for more details. 

Also there are some really great items in the While Supplies Last category at deep discount!  New catalog starts Aug 1st and it is AMAZING!!!  Including a BRAND NEW EXCLUSIVE CRICUT CART!!!  Artbooking - this will be not only great for card-makers but especially scrapbookers too!!!!

Have a great day everyone!!!!

Thursday, June 6, 2013

Sunshine

Yesterday was the first day of summer break here...but you'd never know by the cold breeze, gray skies and all the rain we've been had.  Today is more of the same...I long to see the sunshine!!!

Which was the inspiration for today's card.


If I can't have the real thing, I can make it!  I used the sun from Cricut Create A Critter.  In CCR I welded two together to make my card base out of white.  Then cut another one from yellow along with the layer. I inked all the edges of these with a small Studio G orange ink pad. Using CCR I hid the face so I could stamp it with a Peachy Keen face - I think it is everyday face assortment.  I used a white gel pen to color in the eyes and some pink chalk for the cheeks.  I used a K. Andrews stamp for the sentiment, stamped with CTMH Cotton Candy ink pad.

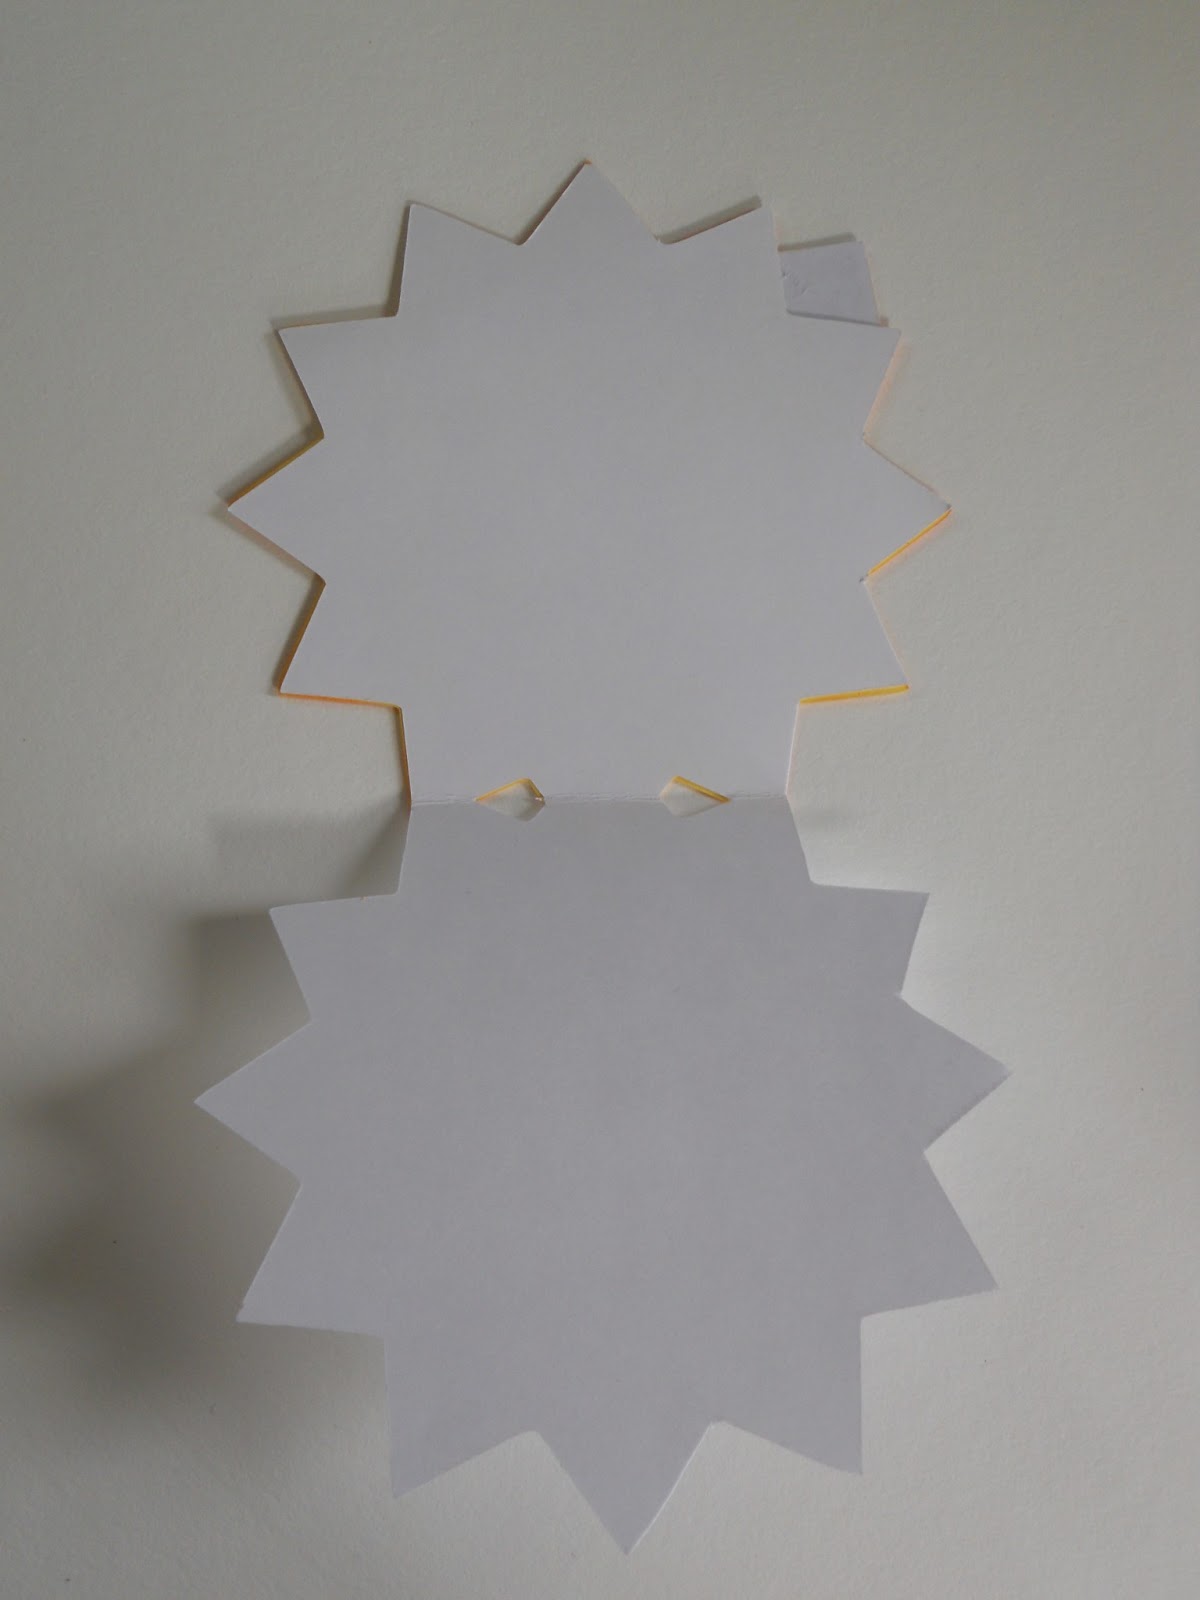
The two in white welded in CCR to make a shape card base


I hope this brought a little sunshine to your day!

Monday, May 27, 2013

Kindergarten Graduation

Hi Everyone!  I've been super busy getting ready for my son's upcoming Kindergarten graduation.  Here are the invitations I've made to send home next week.

Card Front

 I used Teddy Bear Parade, I think this is one of my favorite cartridges EVER!  I used Cricut craft room to manipulate  the size to 4" wide and 5 1/2" long so it will fit in a standard A2 size envelope.  I did not weld the images together to make this card though.  I cut one of the base images from white for the back of the card and one in black to layer for card front.

Inside card open

I scored the white image just below the ears and only applied adhesive to the top and attached behind the card front to make the shape card. I used white so I could include the details of the graduation and it worked out perfect with just enough room for the information.

Open standing
I think they turned out super cute!  I can't believe first grade is right around the corner already!!!   I'm also working on making each of the kids a graduation cap to wear and items to decorate the door ~ but that's for another day.

Hope you enjoyed!  I'll be back with more projects soon!

Thursday, May 16, 2013

Coffee!!

Welcome friends!  It's another beautiful day!  I'm sitting here with my windows open drinking my coffee and watching my son play before we have to leave for school in a little bit.  All is well in my world right now!  :)

Oh coffee, how I love you!  I don't know how I would survive without you!  Today's card is inspired by my love of coffee.


To create the shape card I used Damask Decor Cricut cartridge.  It's on button 30 and I used the shift feature.  I sized it at 5" and welded them together in Cricut Craft Room.  Then I used the same cut about a quarter of an inch smaller and cut 2 for the inside and outside mats.


I ran the mat through my cuddlebug using the Wicker Weave folder and lightly inked it with Tim Holtz Walnut Stain Distress Ink.  The coffee cup came from the Love You a Latte Lite Cricut cartridge.  It's coffee cup 2 on button 15 and I used Cricut Craft Room to hide the steam so I could just use the cup and sized it to 3 1/4".  I adhered it with 1 layer of foam tape to give a little dimension.  The word art stamp on the coffee cup is an Inkadinkado clear mini stamp called Friends Words.  The border stamp is a Maya Road stamp called Vintage Wallpaper and the Happy Birthday stamp is from a PaperTrey Ink set called Year-Round Puns.


I lighly inked the inside mat with the Walnut Stain distress ink again.  The sentiment is a My Creative Time set called Just a Little Note to Say...


I hope you enjoyed my card today.  This will be available in my Etsy shop for purchase.

I'll be back tomorrow with a quick home dec canvas project.  Have a wonderful day!

Monday, May 13, 2013

Happy Anniversary

7 years ago today I married my best friend and our love grows stronger as each year passes.

5-13-06

Here is the card I made for my wonderful husband


I used the car image from the Sweethearts cartridge.  I used the shadow image in CCR and welded it together to make the card base.  The card and all the layers were cut at 5".


I used a CTMH stamp set called Bliss.  This stamp set is no longer available. There is however, in my opinion, an even better one called The Happy Couple.


I'm keeping this short and sweet today, I have a busy day ahead of me!  :)  Have a wonderful day and I will be back tomorrow with a baby shower cake I made over the weekend.


Sunday, May 12, 2013

Happy Mother's Day!


Good Morning and Happy Mother's Day to all you lovely ladies!  Today I have a Mother's Day card to share that I made for my mother in law.  I am not going to see my mom till Memorial Day weekend so I won't be sharing that one till after she gets it. 
Some of you may know, last month I signed up as a Close To My Heart Independent Consultant.  The deal was fabulous!  To make this card I used the Chantilly Scrapbooking Kit that came with the starter kit.
$29.95 G1053

and I also used the Chantilly Dimensional Elements that were also included in the kit
$4.95 X7163C
Aren't these gorgeous!  I couldn't wait to play with them.
Here's the card I came up with.
 While this isn't a new card concept, it is new to me and it's been one that I've been wanting to try for a long time.  I think they are so pretty.  I found a wonderful tutorial from Made by Momo on You Tube.  If you'd like to try this one yourself, check out her video here.
I used Kraft cardstock from my stash for the card pocket and an EK Success border punch to  dress it up.  All the edges were inked with Tim Holtz Tea Dye Distress Ink.  I used a strip of the Chantilly paper and a pink ribbon from my ribbon stash for the front along with one of the CTMH Chantilly fabric badge buttons.  The flowers at the top are from the Chantilly Dimensional Elements pack. The card front sentiment is a Studio G stamp and the inside stamp is from My Creative Time.  I used Twilight and Buttercup cardstock from CTMH for the inside card and mat.
I hope you like my card today!  If you would like to purchase any of the supplies used please click the link to my CTMH shop.  I hope you all have a wonderful day!