Showing posts with label CTMH. Show all posts

Sunday, February 2, 2014

Baby Nursery - Wall Art with Cricut and CTMH

Good Morning everyone!

My husband and I were at the hospital this past Friday for an ultrasound.  Baby is healthy and moving like CRAZY!!  In fact, they couldn't get all the pics they wanted because the baby was moving so much so I'll have to go back again in a few weeks  :)  I don't mind - I could sit and watch my baby all day on that screen!  They were however able to determine the baby's gender!!


We are all excited!  My son especially because he's been saying it's a girl since we found out and he was right!

So now we know, I can really start working on baby projects!  Of course we are moving in 13 days so I need to deal with that first - but I just haven't brought myself to pack up my craft room yet.  I know I need to start soon....In the meantime, it's still out when the mood strikes me.  Like last night!  I was on Pinterest gathering baby girl ideas and came across the most adorable owl canvas.  I had already decided weeks ago, girl or boy, the nursery was going to have an owl theme.

So I sat down with a 12 x 12 blank canvas.  I painted it pink with Folk Art Baby Pink acrylic paint.  While it was drying I cut out pieces with the cricut.


I started with the adorable owl from Create a Critter 2.  I love the hearts on this owl!  I sized it at 5" for my canvas using cocoa, blush, buttercup, and the dark pink was from my scraps.


Then I added the phrase.  The letters were cut using the Rock Princess cartridge using the heart font.  I cut the letters at 1.25".

Then, using Cricut Artiste I cut hearts to go both above and below the phrase.  They were cut at 1".  Once I had all the paper cuts down, I went over it all with a couple coats of Mod Podge to seal it all in.  


After the Mod Podge dried, I added some flowers and buttons from my stash and I added the glitter detail to the owl and hearts using some Studio G glitter glue.


And here it is all together.  The space over the owl was left empty on purpose so that after we agree on a name I can go back and add it in.  We have it narrowed down to two possibilities :)

Linking to:
Little Scrap Pieces - any card, project or layout
BBTB2- baby challenge

Hope you enjoy and come visit again!!  Have a wonderful day, and if you are going out for the Superbowl today, please be safe!

CTMH NEWS:  The new idea book is now available on my website!  If you haven't checked it out, please do - lots of new products and gorgeous papers!!  Click here to view - or leave me a comment if you would like me to send you your own book. 

We also have a couple of great specials going this month!


Embossing is Boss!  If you haven't heard, CTMH is now selling embossing folders!  YAY!!!!
There are 5 designs available for purchase.  They are $8.95 each, but you can get yours for FREE!!! During the month of February, you qualify to receive a free embossing folder for every 2 packs of bulk cardstock (single color or combo) you purchase! That is a savings of $8.95! Select from 5 new embossing folder designs—dot, chevron, quatrefoil, damask, or stripe—when you submit a qualifying order.


And of course, with the start of each new month begins a new Stamp of the Month!  This month we have "Wild about Love" waiting for you!  Isn't it so cute!!  And it coordinates with the Cricut Art Philosophy cartridge! The stamp of the month is only available in the month it is presented.  You can purchase separately for $17.95, or you can get it for only $5.00 with any $50.00 purchase.

Check out this video featuring some new stamp sets and one of the exclusive Hostess stamp sets.

Lots of great stuff going on!  I'll be posting soon with some of the new, exclusive Hostess only stamp sets available from this book soon also.  If you have any questions at all, or are interested in hosting your own online gathering to earn exclusive Hostess only items, free product and half off items please let me know!  

Have a wonderful day!!!
Hugs ~ Dawn

Sunday, January 26, 2014

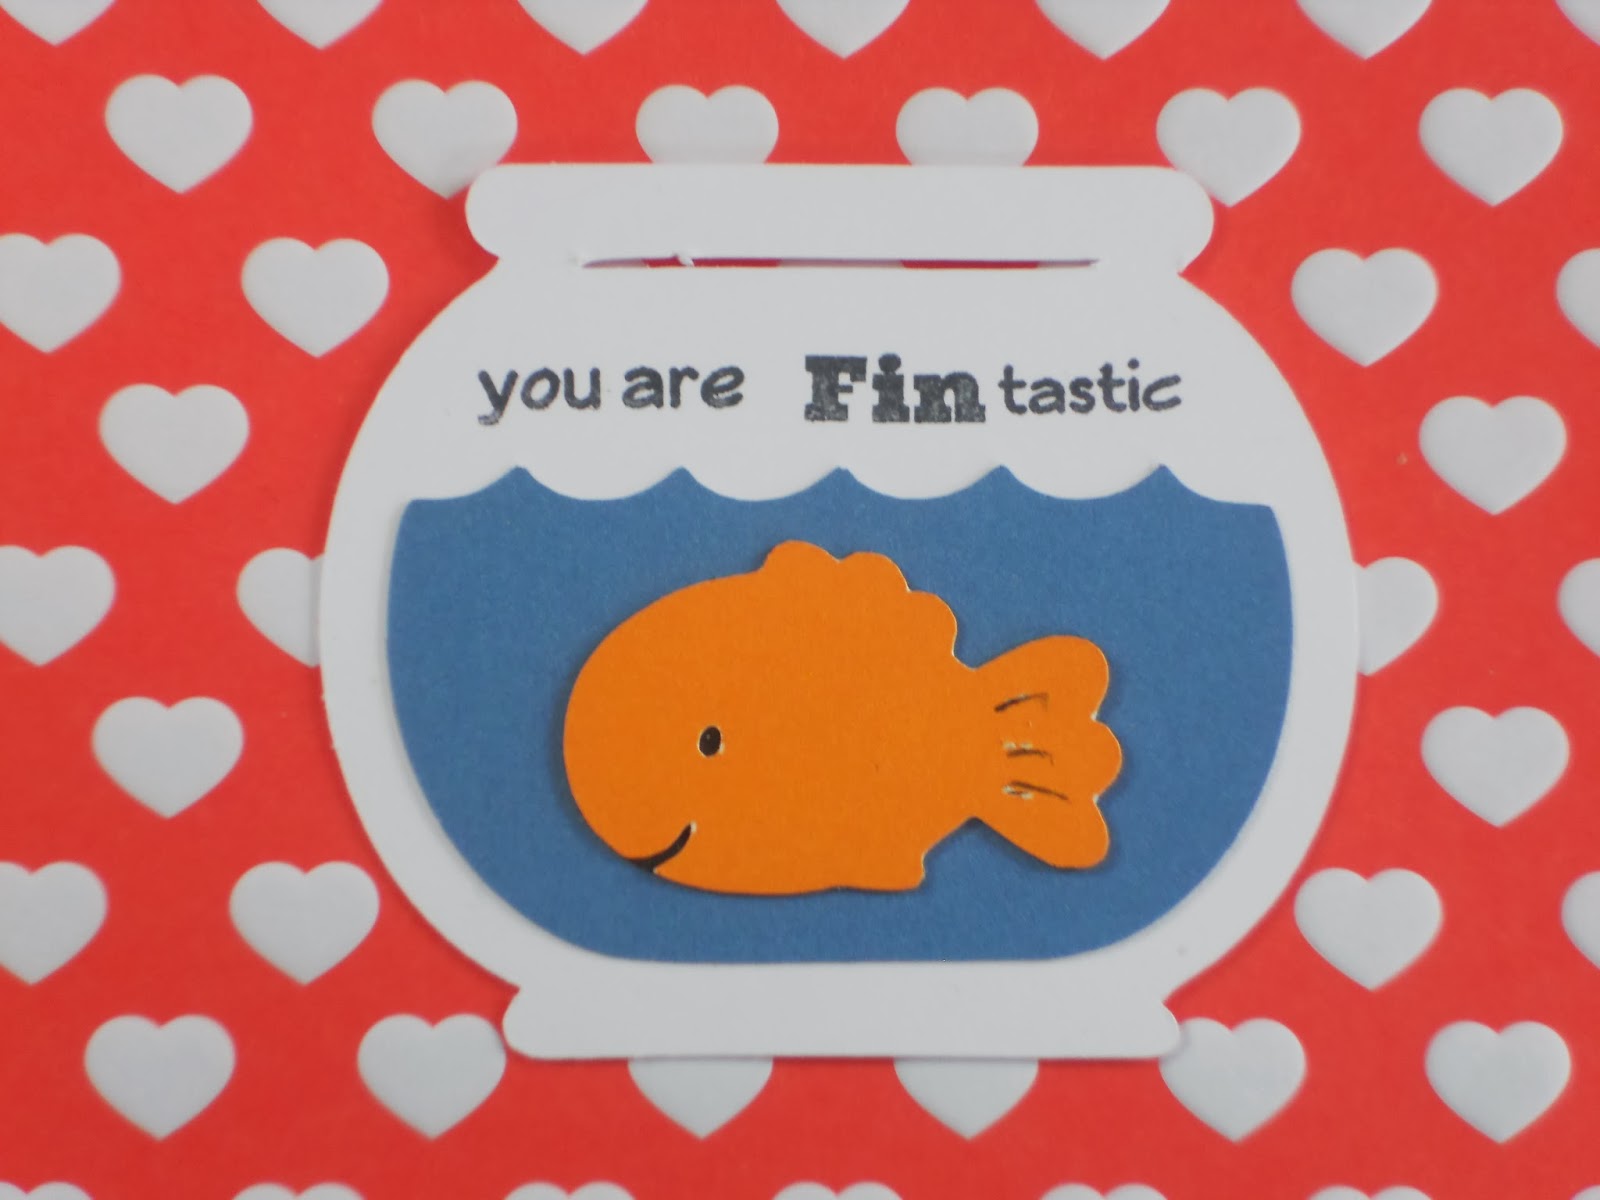
You are FIN- tastic -- a Valentine

Hi Everyone!  How are you all doing this wonderful Sunday??

I'm up to my ears in moving boxes :)  Only about 3 week till our move day.  And since I need to start packing up my craft room I decided to get Max's school Valentine's done early.


OMGeeeee I love them!!!!  I used Create A Critter for both the fish and the fishbowl.  The bowl is cut at 2 1/2" using white daisy and indian corn blue cardstock.  The fish is cut at 1"  using black and  honey cardstocks.  The lines in the fins didn't show the black very well from underneath so I just went in with a black gel pen to add some color.  The stamps I  used are from a K. Andrews design set called Splashtastic Summer using black ink 


On the back I used B1399 Crafted With Love stamp in Cranberry.  Then I useD1560 Holiday Tags for the Happy Valentine's Day and the from stamps in Hollyhock.  There's just enough space left for Max to sign his name :)


They will all be attached to the snack size bags of Goldfish crackers - once I get to the  store  LOL

And now I'm going to pack some more boxes....Have a wonderful Sunday!!!

January Specials:
Cloud Nine cardmaking kit
Stamp of the Month

Retiring Items - available while supplies last or Jan. 31st.  New catalog begins Feb. 1st!

While Supplies Last - deeply discounted clearance items

Linking to:
Little Scrap Pieces - anything goes

Sunday, January 12, 2014

Happy Birthday, with Cricut and CTMH

Good Morning Friends!  How are you all today?  I'm spending a few quiet minutes with my coffee and computer before everyone is up and about for thee craziness of the day :)

A good friend of mine's daughter has a birthday coming up next month.  She's turning 10 and I wanted to make something special for her.  I have the card done, but still brainstorming some gift ideas.


The card base is 5" square and is cut from Cricut Art Philosophy with slate cardstock.  I cut 2 square mats, one from twilight sized 4 1/4" and the other from white daisy sized 4".  (I used CCR to search for the images I wanted so I do not have page numbers to locate them in the handbooks) The banner is cut from Birthday Bash at 1", the balloons are cut from Creative Cards at 1 1/2".  The paper for the banner is from Fancy Pants Designs, a 6x6 paper pad called Time for Spring.  A super cute paper pad!  For the balloons, I covered them with the bonding memories glue pen and covered them with glitter.  I used bakers twine to make a bow for the banner and the strings for the balloons.  They are both adhered and raised with foam tape.


The owl is from Hoot n Holler at 2" out of scraps.  The sentiment is from Joyful Birthday, B1419 and is stamped in Hollyhock.


On the inside, I cut the same square mats as the front.  The sentiment is from The Party is On, C1568.  This is one of the exclusive Hostess Sets available when you host a gathering.  I stamped this with Hollyhock also.  Along the bottom I stamped a border with one of the Washi Wonder stamps, D1558 using second generation stamping.  This again is another Hostess Rewards sets available when you host a gathering.  This was stamped in twilight.  I wanted something a little extra so I used the tiny heart stamp from Lifting Spirits, C1570 and stamped it over the washi border in cotton candy.


I think it turned out super cute!  Hope you enjoyed today's project!

Be sure to check out the While Supplies Last and the Retiring Items sections!  When they are gone, they are gone forever!  New catalog coming Feb. 1st!

Specials available only in January:
January stamp of the month, only $5.00 with a qualifying purchase.
Cloud Nine cardmaking kit, only $15.00 with a qualifying purchase.

 Linking to:
Pause Dream Enjoy, balloons
Jo's Scrap Shack, anything goes
Friday Mashup, birthday theme with twine
Crafting by Designs, birthday
Fantabulous Cricut, use a sentiment


Tuesday, September 24, 2013

Another fall card, part 2

Hi everyone!  I'm back with part 2 of the fall cards.  Yesterday's is about as close to clean and simple as I get.  Today's is the same basic principles but kind of grungy.


This card again starts with a base from Cocoa cardstock but instead of a white mat, I used Champagne for a softer look.  I also inked the edges with Chocolate ink.  For the color background, I used a sponge instead of inking my clear block.  Colors used are Sunset, Goldrush, Olive and Barn Red.  I stamped the leaves in Chocolate using the Fall Harvest stamp set.  I stamped the sentiment from the same stamp set using Cocoa ink.  I added some strands of fall colored jute from my stash and tied a knot.


On the inside, I used a pattern paper from the Huntington collection and used more champagne cardstock - torn and inked with Goldrush.


I'm not sure which I liked better.  I think I like them both equally and had fun using some new to me techniques!  I hope you all are having a wonderful week!

If you haven't been to the While Supplies last section  lately, go check it out.  The Spellbound Paper Packsfrom last year are in there for $2.20!!  And a bunch of other great stuff super duper cheap!

You also have about a week left to take advantage of the National Stamping Month promotional stamp set and the amazing Poster Tidings Stamp of the Month.  ~~  This would be a great month to get one of the exclusive Cricut cartridges and take advantage of the specials!  For $114.00 you would get a Cricut cartridge, 3 sheets of dimensional elements and 7 stamp sets!  And no matter what cartridge you choose, you will not go wrong - they are all must haves!!  All of this would retail for $190.85 so it's an amazing savings!

Linking to:
An Inky Situation - fall leaves
Jo's Scrap Shack - anything goes
Cardz TV - colors of fall

Monday, September 23, 2013

Another Autumn card....

Hey everybody!  I'm back with another fall card today.  This is actually one of two cards that I made using the same stamp set and basic colors but have vastly different results.  I've been watching a lot of videos recently on some inking techniques and wanted to try a couple of them out.  These aren't new ideas, just new to me :-)

The first one I wanted to try color blocking.


I started with Cocoa cardstock for the base, cut 4 1/4 x 11 and scored at 5 1/2 to make a portrait card.  The mat is with White Daisy cardstock cut 4 x 5 1/4.  For the color blocking I used the 2 x 3 1/2 clear block that comes in the starter kit and applied the ink directly to the block.  I used Goldrush, Sunset and Olive and pressed the inked block to the paper.  Then, using the Fall Harvest stamp set I stamped the leaves with Chocolate an the sentiment with Cocoa.  For the final touch I added some Opaque Mocha adhesive gems.


I kept the inside clean and simple using a mat of Goldrush and White Daisy.


I was pretty happy with this one and really liked the color blocking.

I'll be back tomorrow with the second card using the same stamp set and colors.

If you haven't been to the While Supplies last section  lately, go check it out.  The Spellbound Paper Packsfrom last year are in there for $2.20!!  And a bunch of other great stuff super duper cheap!

You also have about a week left to take advantage of the National Stamping Month promotional stamp set and the amazing Poster Tidings Stamp of the Month.  ~~  This would be a great month to get one of the exclusive Cricut cartridges and take advantage of the specials!  For $114.00 you would get a Cricut cartridge, 3 sheets of dimensional elements and 7 stamp sets!  And no matter what cartridge you choose, you will not go wrong - they are all must haves!!  All of this would retail for $190.85 so it's an amazing savings!

Linking to:

An Inky Situation - fall leaves
Jo's Scrap Shack - anything goes
Cardz TV - colors of fall

Sunday, September 22, 2013

Have a Splendid Day ~ a fall card

Hello friends!!  So happy to be back in my craft room today!  I thought I was going to lose my mind if I didn't get some crafting therapy soon.

And today is the first day of fall!!  My favorite season.  I've been going crazy with apple, pumpkin and cinnamon recipes in the kitchen.  I have my fall scented candles burning from morning till night and so of course I started with some fall cards to get back into the swing of things.

I started with a sketch from Crazy 4 Challenges blog


And here is what I came up with


I used Chocolate cardstock for the base.  All the pattern papers come from a new fall 6x6 pad I got, Echo Park Paper, Reflections Fall by Lori Whitlock.  The apple is cut from Doodlecharms at 2.5" using CTMH cardstock colors Champagne, Olive, Cocoa and Barn Red.  I also inked the edges with the coordinating inks to eliminate the white edges.  I used the stamp set Harvest Happiness for the sentiment and the leaves and cut the corresponding shapes from Art Philosophy.  I stamped the sentiment with Chocolate and the leaves with Olive, Barn Red and Goldrush.  I added a button and jute bow from my stash and attached the apple with an Action Wobble.


On the inside, I used the border stamp from the Harvest Happiness stamp set in Cocoa.  I used a scrap from the same 6x6 pad - it's the opposite side of one the the papers from the front.  I also used the same leaf stamp with Olive ink using the second generation stamping technique.


Apples, leaves, fall colors - how can you go wrong??  

I hope you are all having a wonderful, relaxing Sunday!  I have some other projects that are half completed, so I'm going to finish those and I'll be back tomorrow.


Oh - I wanted to let you all know there are some new products added to the While Supplies Last section.  If you haven't been there lately, go check it out.  The Spellbound Paper Packs from last year are in there for $2.20!!  And a bunch of other great stuff super duper cheap!

You also have about a week left to take advantage of the National Stamping Month promotional stamp set and the amazing Poster Tidings Stamp of the Month.  ~~  This would be a great month to get one of the exclusive Cricut cartridges and take advantage of the specials!  For $114.00 you would get a Cricut cartridge, 3 sheets of dimensional elements and 7 stamp sets!  And no matter what cartridge you choose, you will not go wrong - they are all must haves!!  All of this would retail for $190.85 so it's an amazing savings!

Linking to:
BBTB2 - fall
Craftin Desert Divas - fall
Paper Playtime - apples
Die Cuttin Divas - apples
An Inky Situation - fall leaves
Little Scrap Pieces - any card/project
Friday Mashup - fall food
Jo's Scrap Shack - anything goes
CardzTV - colors of fall
Crazy 4 Challenges - sketch


Thursday, September 5, 2013

Love Never Melts

Hi friends!!  Short and sweet today - my schedule is messed up from the holiday and I've fallen behind on everything....but I have a quick winter card to share!


All the papers and cardstock come from the Frosted paper pack.  The snowman comes from the Flakey Friends stamp set.  I edged all the papers and stamped the snowman with Twilight ink.  The ribbon is one from my stash and I added Stardust Glitter Gel to the snowballs and the line of snow under the snowman.

Card base is 4 1/4" x 11", scored at 5 1/2".  
Mat layers are:
4" x 5 1/4"
2 3/4" x 3 1/2"
2 1/2" x 3 1/4"
2 3/8" x 3 1/8"


The inside is lined with more papers from the Frosted paper pack.  The sentiment is also from Flakey Friends and I continued with the Twilight ink.


I hope you enjoy!  I'm off to do a million and one things today!  Have a great day!!!

Linking to -
An Inky Situation - sketch

September Specials!
You are My Happy - National Stamping Month
Poster Tidings - Stamp of the Month

Wednesday, September 4, 2013

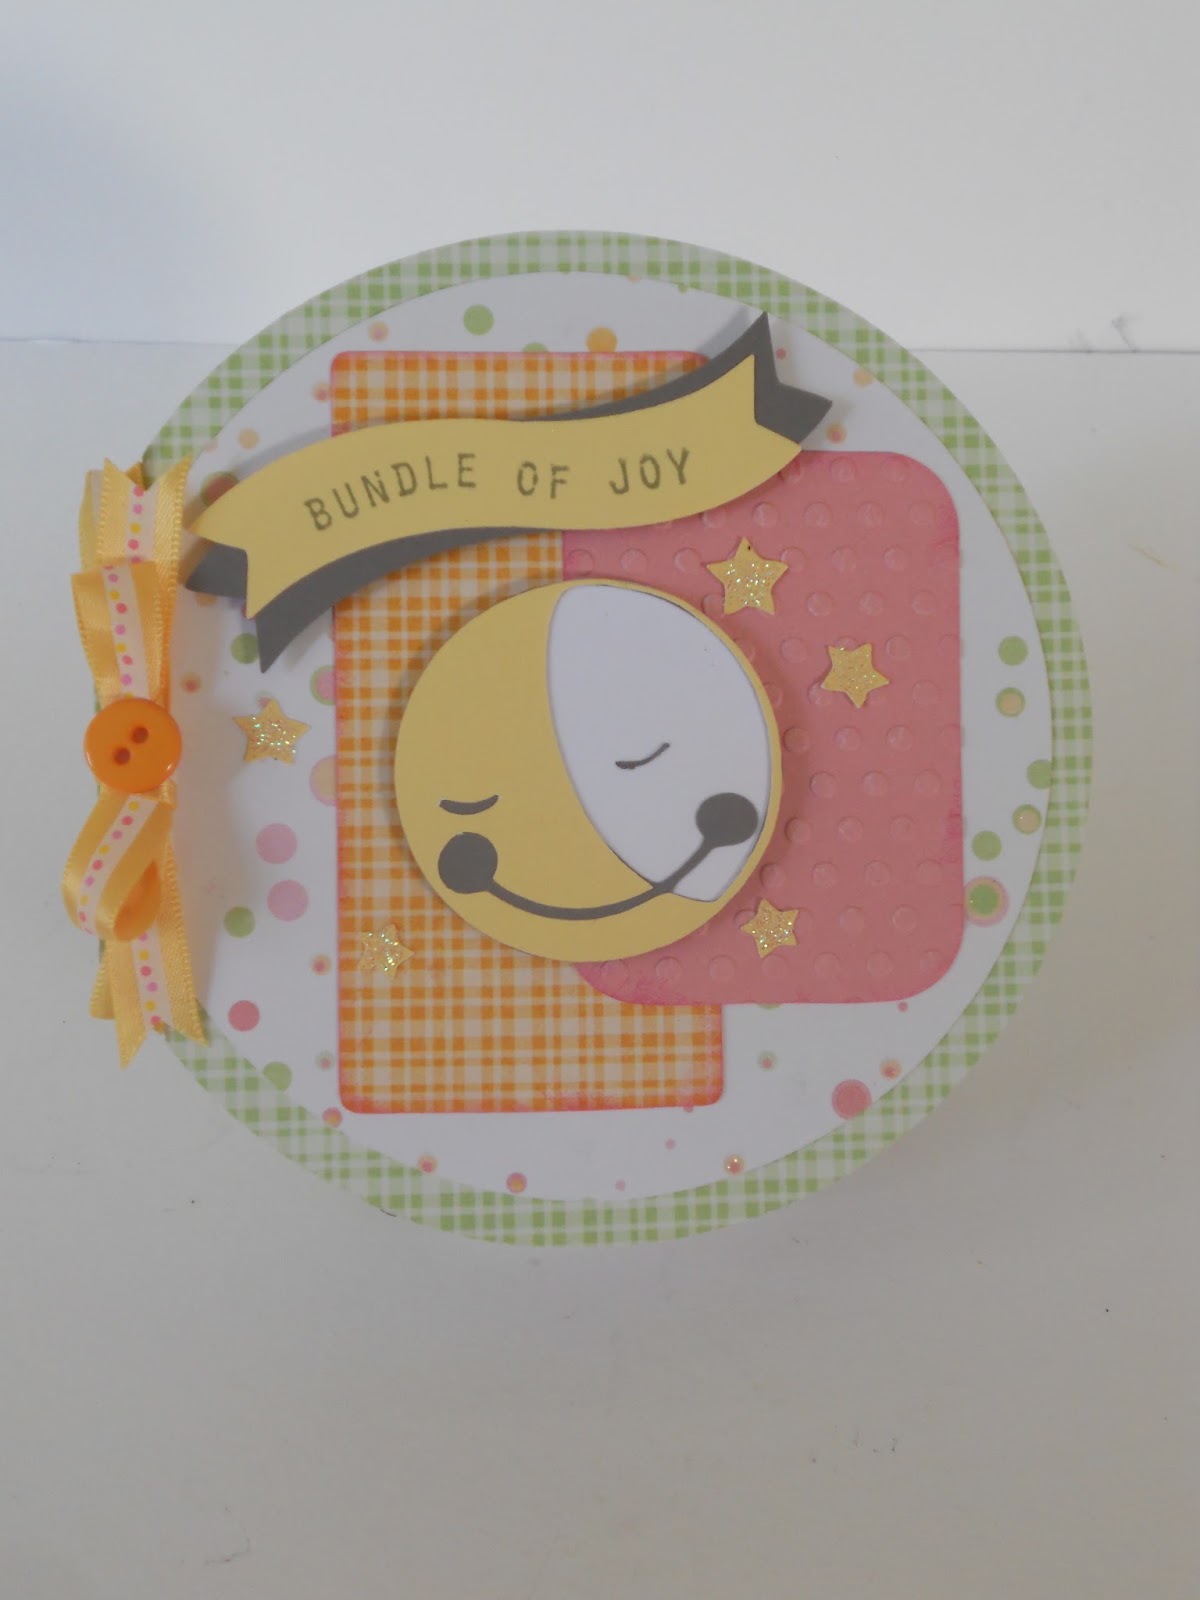
Bundle of Joy

Hi Everyone!  I have a sweet baby card to share today.

I started with a circular sketch
and here's my take on it...

 I used Birthday Bash for the card base at 5".  The circle layer was also cut from Birthday Bash.  I just eyeballed the size of the rectangles till I liked how it looked and rounded the corners. The solid pink rectangle I ran through the cuddlebug with the polka dot embossing folder.  The banner was cut from the Artiste cartridge and the moon and stars are from the Baby Shower cartridge.  The pattern papers are from the DCWV stack Nana's Nursery, Baby Girl.  Cardstock colors used are Blush, Buttercup, White Daisy and Slate.  The sentiment is a mini clear stamp I picked up at Joann's and I used Slate ink.  I added clear glitter glue to the stars and the ribbon and button are from my stash.


For the inside, I cut two more circles from the Birthday Bash cartridge.  One in Blush and one in White Daisy.  I picked up the sentiment stamp from an Ebay Store called PrairiePeddler.  The stars are from the CTMH set called Glory to God.  I  stamped the sentiment in Slate and the stars in Buttercup.

Hope you all are having a wonderful day!!

Linking to:
Crazy4Challenges - buttons and bows
Craftin Desert Divas - babies
Paper Playtime - use 3 pattern papers
Die Cuttin Divas - sketch

September Specials!
You are My Happy - National Stamping Month
Poster Tidings - Stamp of the Month

Tuesday, September 3, 2013

Gift Ideas from my Kitchen - Crunchy Pumpkin Pie Granola

Hi Everyone!  I hope you had a wonderful weekend!

Since it's cooled off I've been able to turn the oven on again and test out some recipes!  After my craft room, the kitchen is my next favorite place to create.

 I've started thinking about Thanksgiving.....this is my third year hosting dinner for my family.  I was so nervous that first year!  And, while I don't have all the kinks worked out, I try to have fun with it and not be so stressed.  My biggest obstacle is time management and getting dinner on the table as scheduled and not having everyone starve while they wait. Last year, for each person,  I decorated some small mason jars and filled them with a snack mix.

This year I wanted something different that incorporated the flavors of fall - to me, that is pumpkin and apple.  I came across a recipe for Crunchy Pumpkin Pie Granola on Allrecipes.com and tested it out this morning.  This granola is so yummy, took only 15 minutes to mix up and made my house smell wonderful!

Fresh from the oven
I found these little zip lock bags to package the granola in.  I find zip lock bags are much easier for my son to open and close instead of a twist tie.  Less mess for me to clean up too.

And of course I had to dress them up and make them look nice!


I used the cricut Art Philosophy cartridge to cut the fry box at 9" - you can get 2 of these from a 12 x 12 sheet of paper.  I used one of the  designs from the Huntington paper pack for the box and the coordinating cardstock in the pack for the other cuts.  For the turkey and the sentiment I used the Perfect Fit - Thanksgiving stamp set with the cricut Artiste cartridge.  I used Barn Red ink to stamp the turkey. 


And I used Cocoa ink for the sentiment and Olive ink for the flourish.  I used Goldrush to ink all the edges of each piece.


And here it is all put together.


Cute and yummy!  One detail for Thanksgiving done!  Yay!

Here is the link to the recipe at Allrecipes.com.

Have a wonderful week!!

Linking to:
BBTB2 - fry box challenge
Little Scrap Pieces - any project

September Specials!
You are My Happy - National Stamping Month
Poster Tidings - Stamp of the Month


Monday, September 2, 2013

BOO! An Artiste Halloween Card

Ahhhh...it' so nice and cool out today!  A wonderful breeze coming in through the window and I had a whole day to myself in my craft room!  And even better than that, my hubby is making homemade pizzas for dinner as I type this!  yum!!

So with the cooler weather - and I am enjoying this as much as I can because I know it will be hot again - I am back in the Halloween mood!  I have been working on Halloween cards and home dec projects all day.

Here's the first card ~


The card base is from the Artiste cartridge. It is found under Accent 4, shift, button 48.  I sized the card at 5 1/2" in height and it came out to just about 4" in width.  I found an oval on the Artiste cartridge as well (Accent 2, button 6) and sized it in CCR to fit perfectly over the center of the card base.  I'm not sure who makes the striped paper I used - it was a 12 x 12 stack, but the cover had come off.  The cute ghost is from Paper Doll Dress Up and was cut at 3 1/2".  I used a black gel pen to go over the little cuts on the ghost to make his face.  I also stamped two black bats from the Creepy Creatures stamp set with black ink and inked the edges of the oval as well.


I cut the same oval I used on the card front, but this time in white for the inside.  Boo! is cut from the Artiste cartridge at 1".  It is found under Basic, shift, button 47.  I used the bats again and the little rat from the Creepy Creatures stamp set.


Super simple and, I think, super cute!!  I hope you're all having a fabulous day!  Back to work for me tomorrow.  I'm so thankful I was able to take advantage of today.  Have a great week!!

September Specials!
You are My Happy - National Stamping Month
Poster Tidings - Stamp of the Month

Sunday, September 1, 2013

You are my Happy!! ~ It's National Stamping Month!!

Good Morning!!!  I'm so glad you are here today!  I have some exciting new stamps to share with you today in celebration of National Stamping Month!

Through the month of September, with a qualifying purchase, you can get this special You Are My Happy stamp set for only $10.00!  There are 3 stamp sheets included in this set, retail value of $47.90!  You will receive one sheet of alphabet letters, one sheet of sentiments and one sheet of icons.  And some of the stamps on the icon stamp sheet coordinate with the Art Philosophy cartridge!  You can watch the video about these amazing stamps here!

Sentiments

Icons

Alphabet
I absolutely LOVE this set!  I think it's so cute and whimsical!

Here's the first project with this set - I know there will be many more  :-)


The card base is 5" x 5" in black cardstock.  Then I cut a piece of white daisy 4 7/8" x 4 7/8".  I used the small flower from the You Are My Happy icon stamp sheet to create a background with black ink.  Next there is a black mat cut 3 1/2" x 3 1/2" and a white mat cut 3 3/8" x 3 3/8".  On this white mat I used the Washi Wonder stamp set.

This is another new set and is exclusive to Hostesses!  Check out this video for the great new Hostess Rewards you can earn ~ Amazing new stamps with even more amazing prices!!  Contact me with any questions and how you can earn these for yourself!!

Back to the card ~ The smallest square has a black mat 2 1/4" x 2 1/4" and a yellow mat 2" x 2".  I stamped the sentiment Hugs Kisses and Best Wishes from the You are My Happy stamp set in black.  I then stamped the adorable butterfly from the You are My Happy icon sheet, fussy cut and adhered only the center so I could slightly lift the wings.  The inspiration for this card came from a sketch over at Jo's Scrap Shack this week.


For the inside I just layered the mats and left it blank for now.  Yellow mat is 4 1/2" x 4 1/2", black mat is 3 1/2" x 3 1/2" and the white mat is 3" x 3".


I hope you are all having a wonderful weekend!  My husband picked up a bicycle for me yesterday.  He and my son have been going on bike rides together for the last couple weeks and now I can join them!  So excited for that!!

Linking to:
Jo's Scrap Shack - sketch
Cardz TV - color pop, black and white with pop of yellow

September Specials!
You are My Happy - National Stamping Month
Poster Tidings - Stamp of the Month